Uncategorized

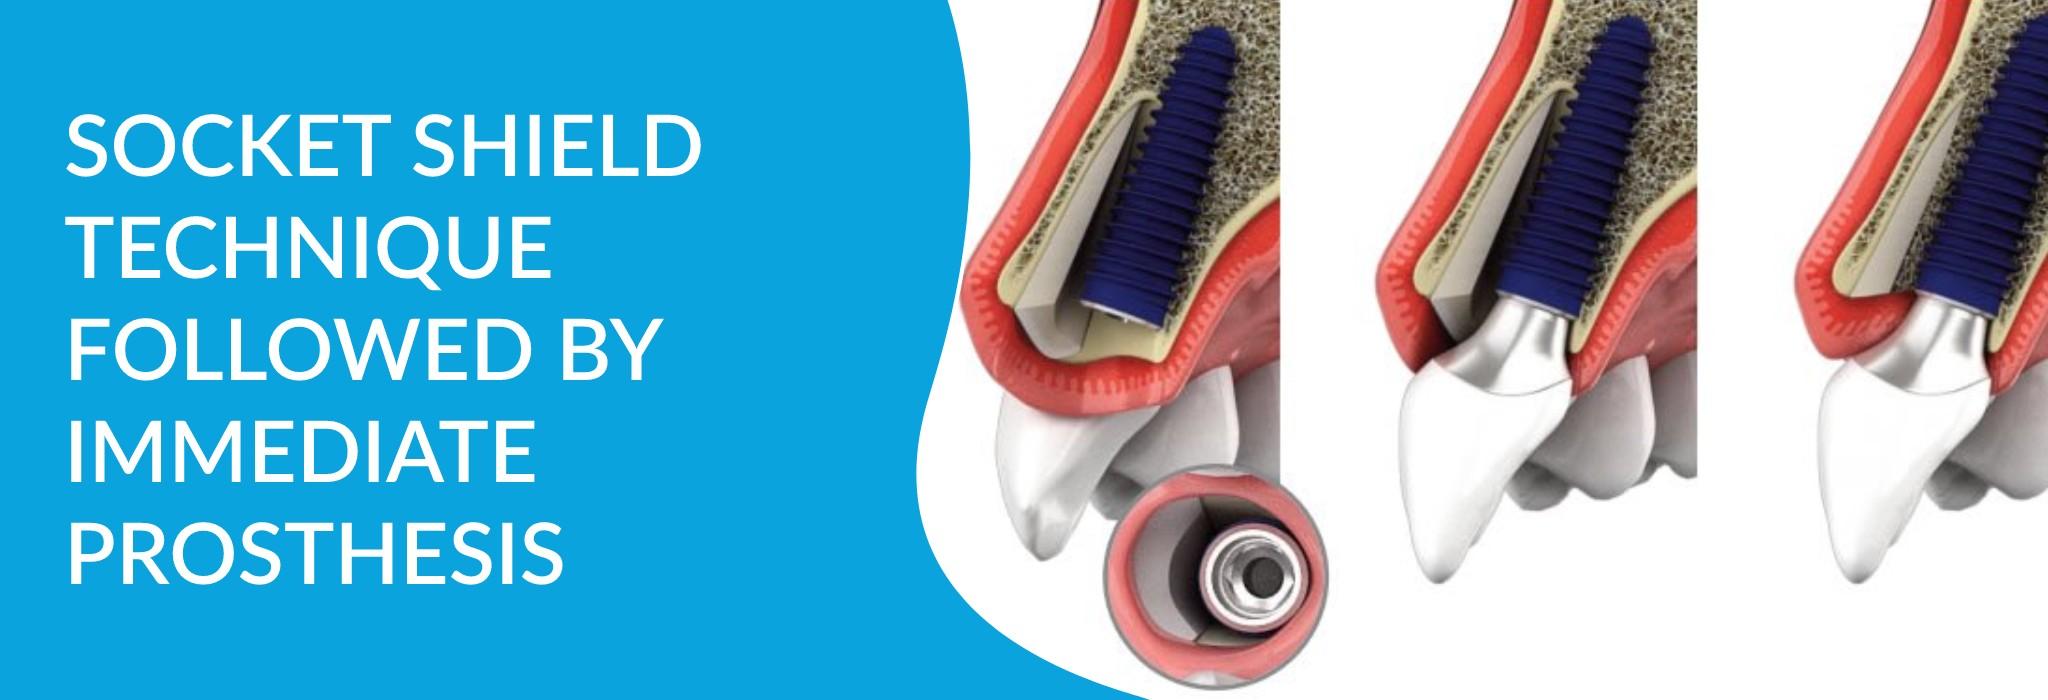
SOCKET SHIELD TECHNIQUE FOLLOWED BY IMMEDIATE PROSTHESIS

Introduction

Maxillary anterior teeth are very important in achieving successful aesthetics. Several factors contribute to this success which includes patient’s healing capabilities, level and condition of existing soft and hard tissues and provisional and final restorations.
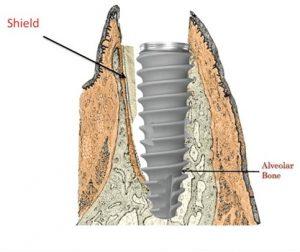
  • Tooth extraction is followed by severe bone alterations both in height and width. Such re-modelling can make implant placement a challenging task mainly due to deficient  facial bone. However, it is possible to overcome this challenge by carrying out Socket Shield technique by partial extraction.
  • The following case outlines the technical basis of SST and demonstrates its importance in anterior implant planning.
  • Case Details

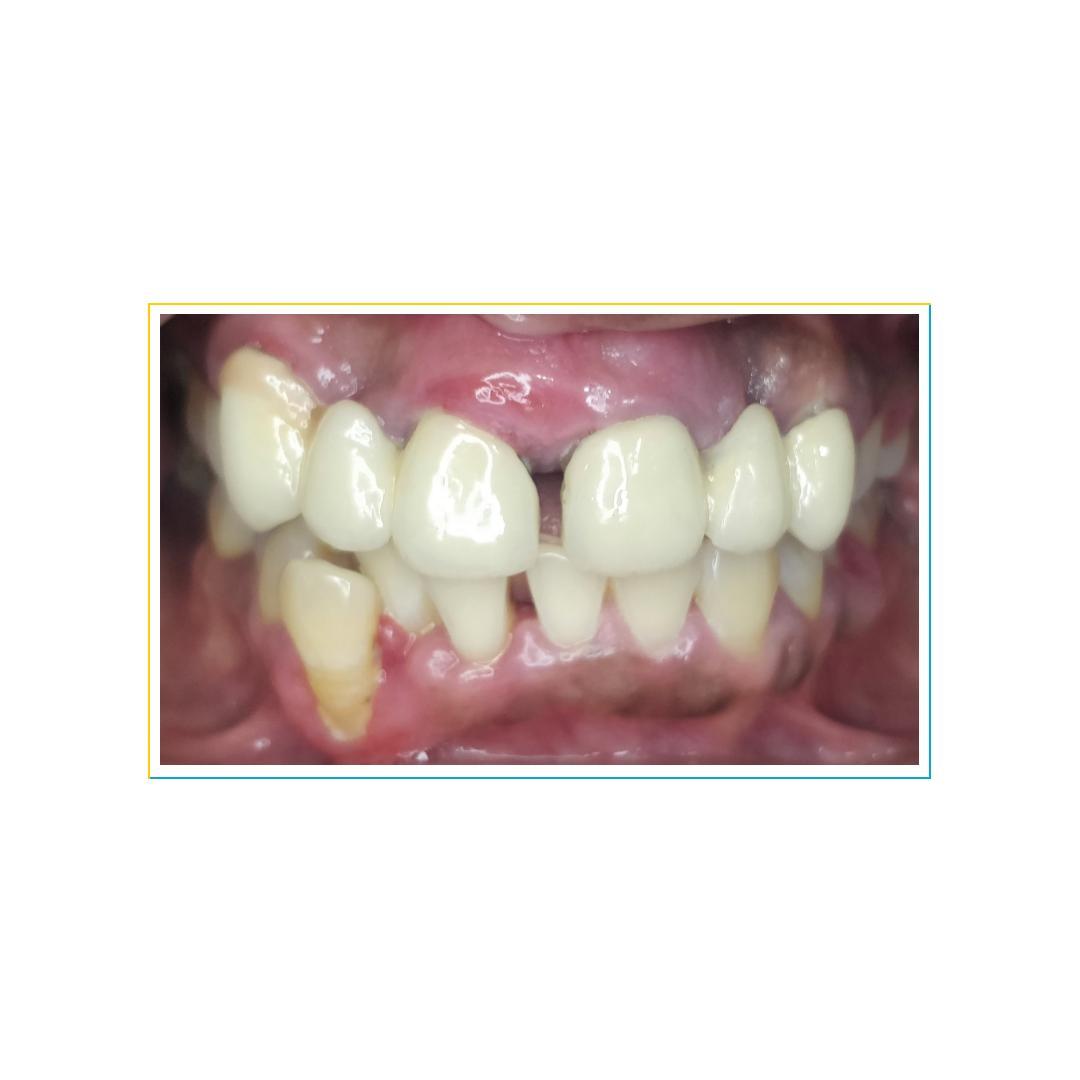
    A 46 year old female patient with no medical history, presented with appalling aesthetics.The patient had high smile line and had a history of wearing fixed prosthesis wrt 11, 13 & 21, 23 with midline diastema since 8 years. Clinical examination showed bulky prosthesis with irregular and short margins and severe gingival inflammation.

    On radiographic examination, the central incisors and prosthesis deemed hopeless, so removal of prosthesis along with 11, 21 was suggested . Also, thin buccal cortical bone was evident, so a socket shield technique by partial extraction of 13, 23 was planned.

    Case Planning

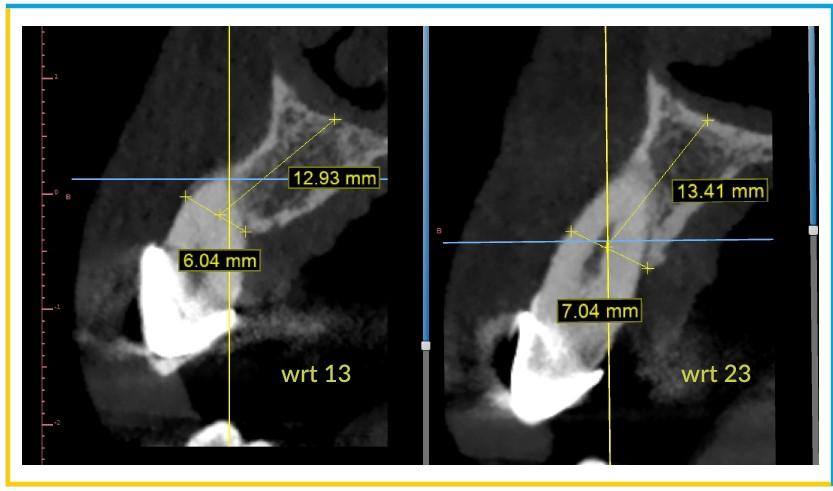
    • Patient’s CT was obtained and the planning was done on Blue Sky Bio software. The anticipated site wrt 13 & 23 were viewed in Cross – sectional and Tangential windows . It was observed that there was a very thin buccal plate available wrt 13 &23.
    • A measuring scale was used to define the measurements of the available bone. The length was measured from the crest of the bone to the nasal floor which was around 12mm and the crestal width was around 6 -7mm  in the right canine region.
    • On the left canine region, the length was around 14mm and the crestal width was around 7mm.
    • The final dimensions of the Implants decided were:  wrt 13 (4.2×11.5mm) & wrt 23 (4.2x13mm).
    • The anticipated placement of the Implants in the desired sites were viewed in panoramic window.


    Case Presentation

    • Following administration of LA, the tooth wrt 13 was sectioned using TF-13 bur at gingival level.  After complete sectioning of the anatomic crown of 13, 11 was extracted using maxillary anterior forceps the FPD along with 11 was extracted in toto.
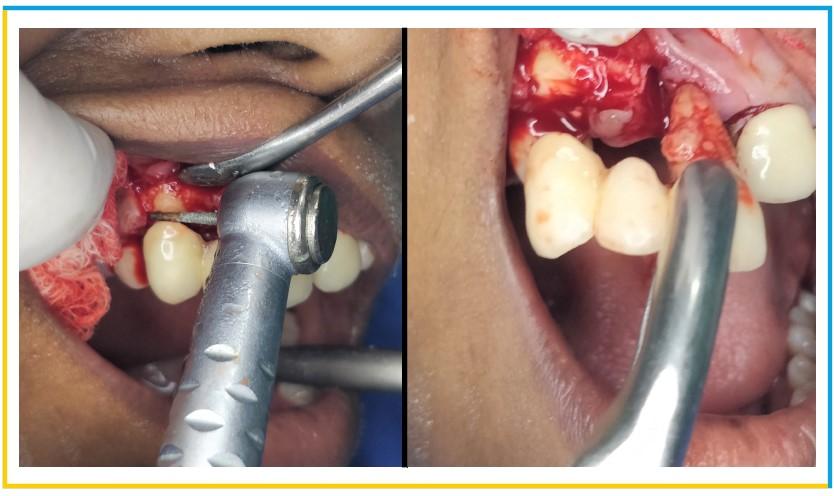

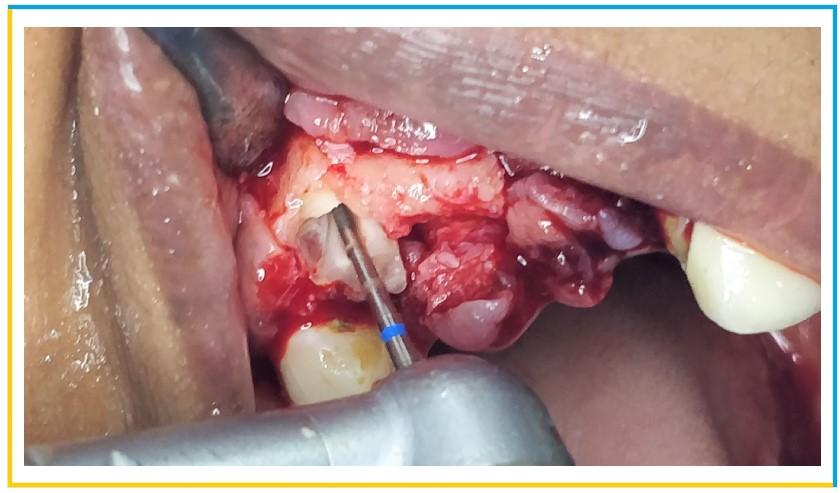
    • Vertical and crevicular incisions were given to raise a full thickness flap and all the granulation tissue was removed. The tooth was sectioned bucco-palatally using PET (partial extraction theraphy) bur kit . This was intended to preserve the buccal 1/3rd of the root intact and undamaged. After thorough sectioning of the root, x-ray was taken to ensure the right path of the cutting.

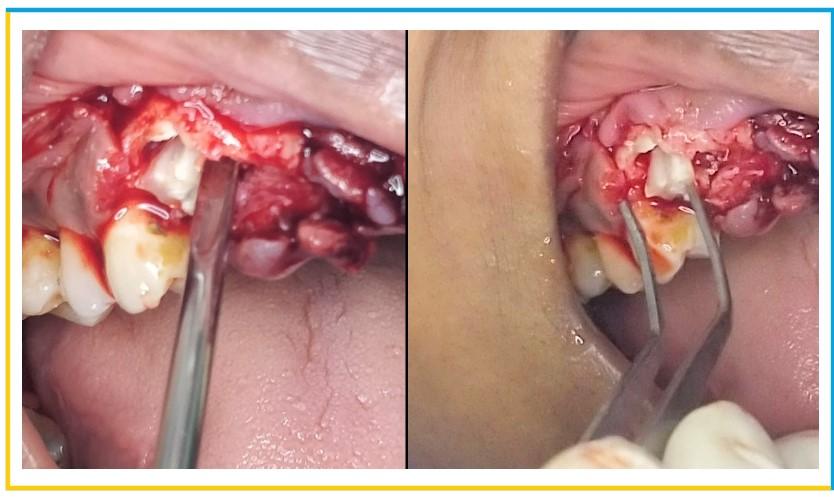
    •  The palatal section of root was then carefully removed without traumatizing the buccal root section using Periotome and root forceps. The remaining buccal half of the root section was then shaped properly and reduced to the level of the alveolar crest. Curettage was done of the extraction socket to remove any granulation tissue.

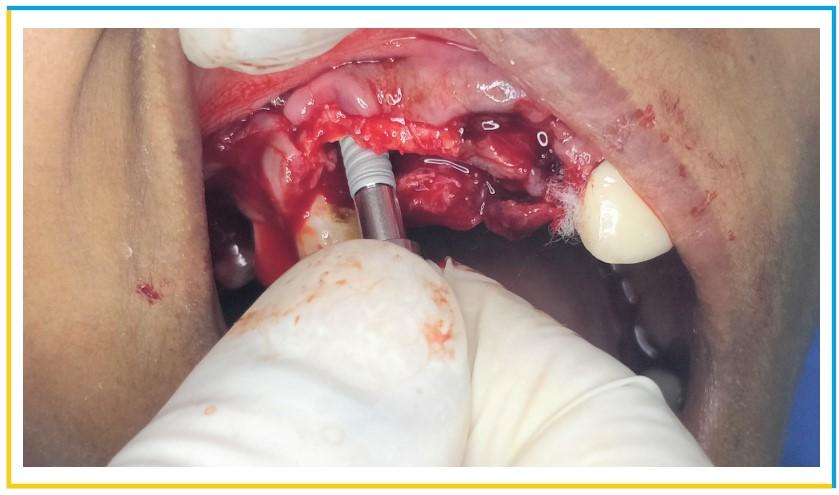
    • Implant placement phase was initiated using a lance drill to engage the palatal aspect of the socket so that the buccal half of root would remain intact. A desired length of 11.5mm was achieved using the lance and pilot drill. Subsequent diameter drills were used to place the desired implant of diameter 4.2mm.

    • For proper flap approximation, the connective tissue was debrided and any remnant granulation tissue was curettaged. 
    • Same procedure was performed for the contralateral side wrt 23. Multi-unit abutments were screwed in for angle verification. 


    • Post-op OPG was taken to verify the implant placement according to the implant planning phase.
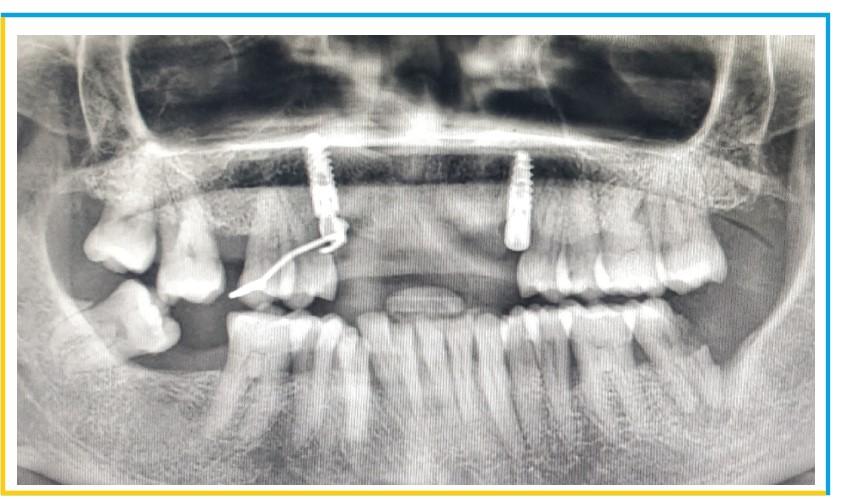

    • After the implant placement, a screw-retained temporary prosthesis was fabricated, chairside as per routine protocol for immediate implant placement in the esthetic zone. For this, temporary cylinders were tightened on the MUAs and holes were drilled in the prefabricated RPD at the temporary cylinders site.
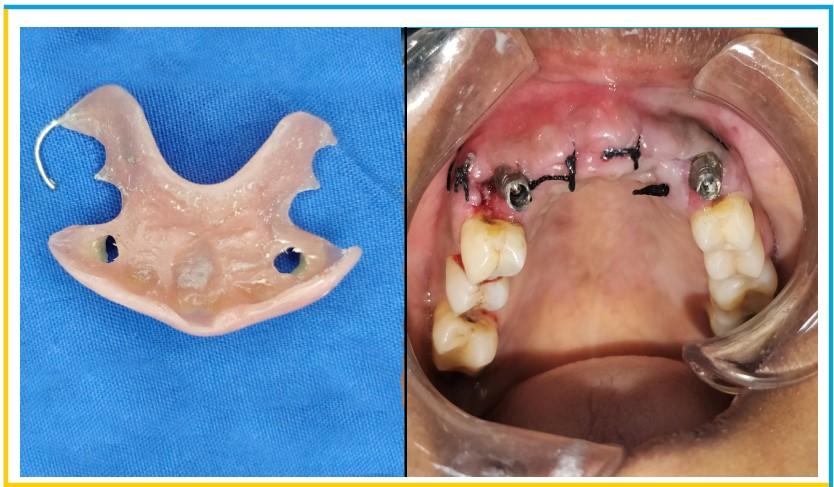

    • Rubber dam was placed and a pick-up of the cylinders was done using cold-cure acrylic resin. After polymerisation, the prosthesis was removed and high-points adjustments were done. After finishing and polishing, the screw holes were blocked with Teflon tape and composite was placed and cured.
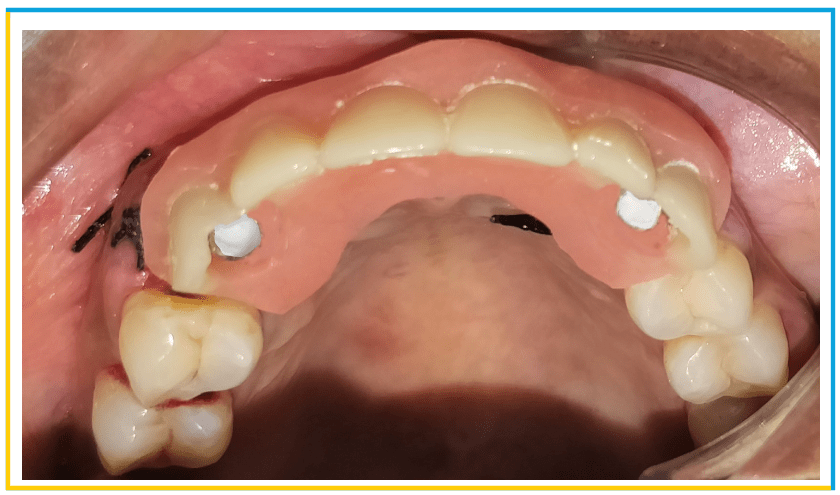

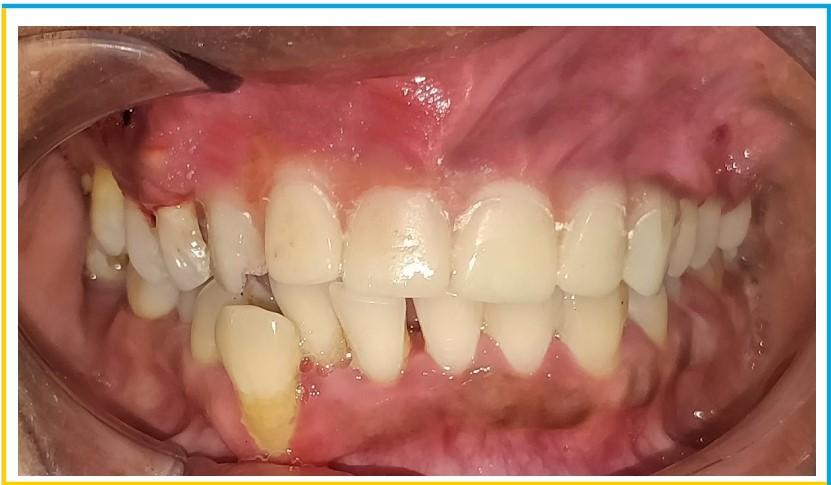
    • Following fabrication of the interim restoration, a meticulous occlusal check was performed to ensure non-functional loading. Postsurgical instructions included antibiotics and analgesic medication and chlorhexidine 0.12% oral rinse. At 2 weeks, the patient was asked to return for a postoperative evaluation. 

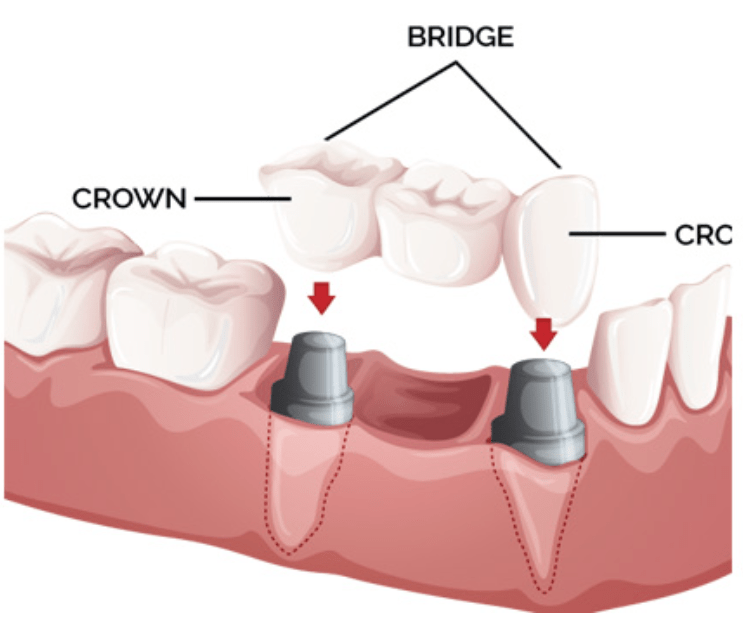
    BEST AND MOST ECONOMICAL STEPS FOR CROWN AND BRIDGE PROSTHESIS.

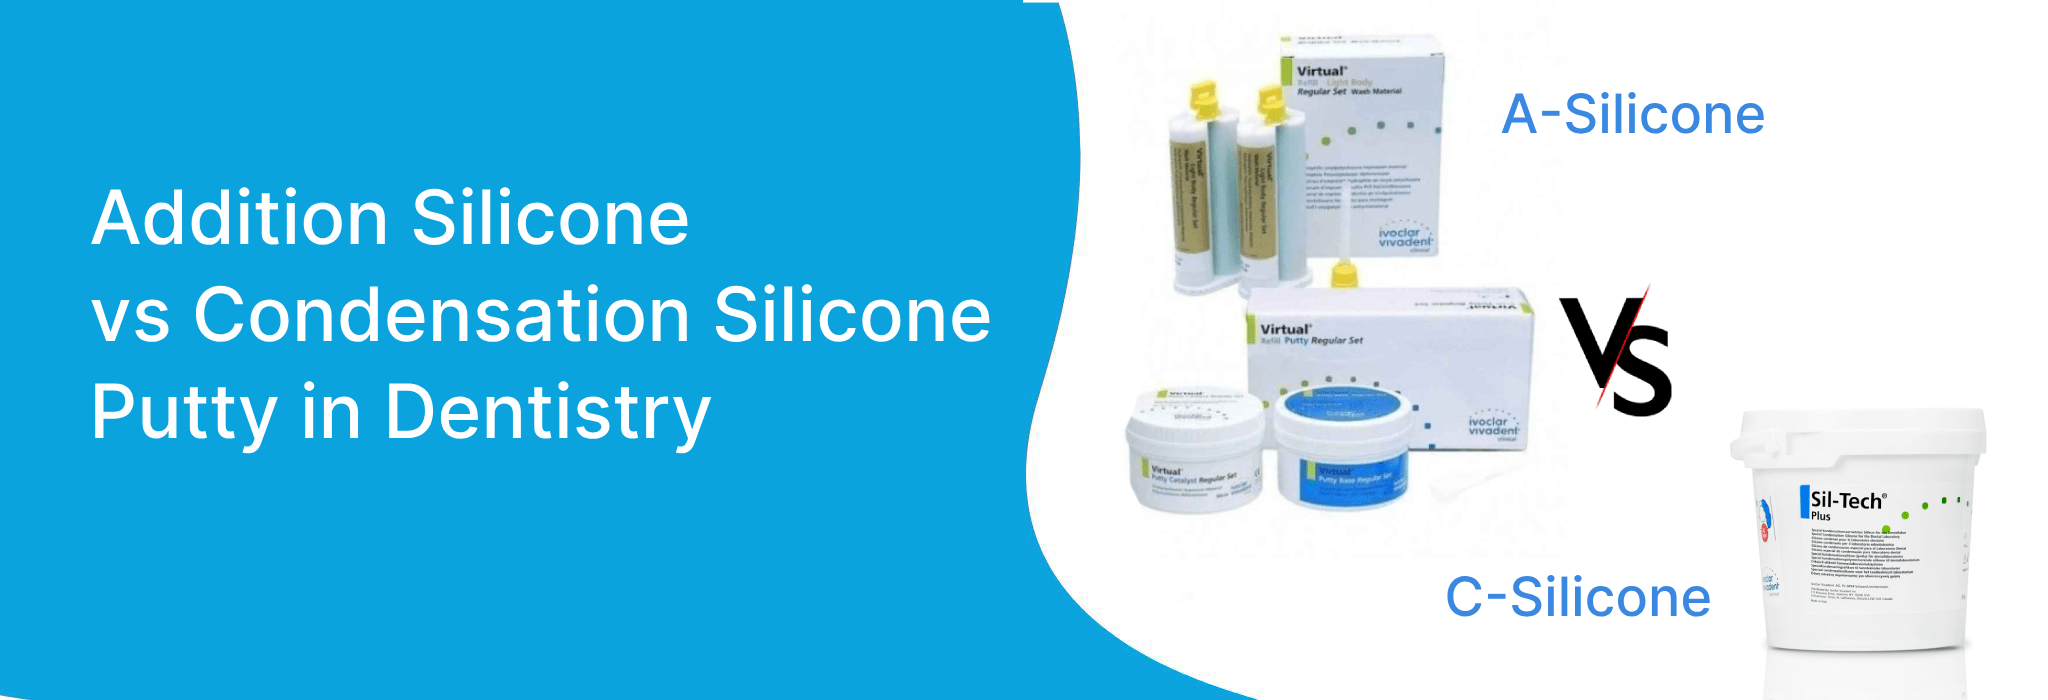
    Addition Silicone vs Condensation Silicone

    ADDITION SILICONE VS CONDENSATION SILICONE IN DENTISTRY

    Welcome to the Kosmo Dental Academy blog, where we explore the fascinating world of dentistry. Today, let’s delve into the intricacies of dental impression materials, specifically focusing on the differences between addition silicone and condensation silicone putty.

    Chemical Composition:

    • Addition Silicone: Also known as vinyl polysiloxane (VPS), addition silicone is a type of rubber that polymerizes by the addition of a curing agent without the release of byproducts. This ensures a highly accurate and stable impression.
    • Condensation Silicone Putty: This type of putty utilizes a condensation reaction during polymerization, releasing byproducts such as alcohol or gas. While effective, it may be prone to slight shrinkage over time.

    DIMENSIONAL STABILITY:

    • Addition Silicone: Exhibits minimal shrinkage upon setting, ensuring the final cast accurately reflects the patient’s oral anatomy.
    • Condensation Silicone Putty: May experience slightly more shrinkage over time, potentially affecting the precision of the final cast.

    DIMENSIONAL STABILITY:

    • Addition Silicone: Exhibits minimal shrinkage upon setting, ensuring the final cast accurately reflects the patient’s oral anatomy.
    • Condensation Silicone Putty: May experience slightly more shrinkage over time, potentially affecting the precision of the final cast.

    SETTING TIME:

    • Addition Silicone: Recognized for its quick-setting properties, addition silicone offers a precise impression in a relatively short timeframe, contributing to enhanced patient comfort.
    • Condensation Silicone Putty: Generally, condensation silicone putty requires a longer setting time compared to addition silicone. This can impact workflow efficiency but may be suitable for specific cases.

    ACCURACY & DETAIL REPRODUCTION:

    • Addition Silicone: Renowned for its exceptional accuracy and detail reproduction, addition silicone is often the preferred choice for intricate dental impressions, especially in restorative and prosthetic procedures.
    • Condensation Silicone Putty: While capable of providing accurate impressions, condensation silicone putty may exhibit slightly less detail compared to addition silicone, making it more suitable for less intricate cases.

    CONCLUSION:

    Choosing between addition silicone and condensation silicone putty in dentistry involves considering factors such as setting time, accuracy, dimensional stability, and tear strength. Both materials have their advantages and are valuable tools in the dentist’s arsenal. The Kosmo Dental Academy encourages practitioners to stay informed about the latest advancements in dental materials, ensuring optimal patient care and treatment outcomes.

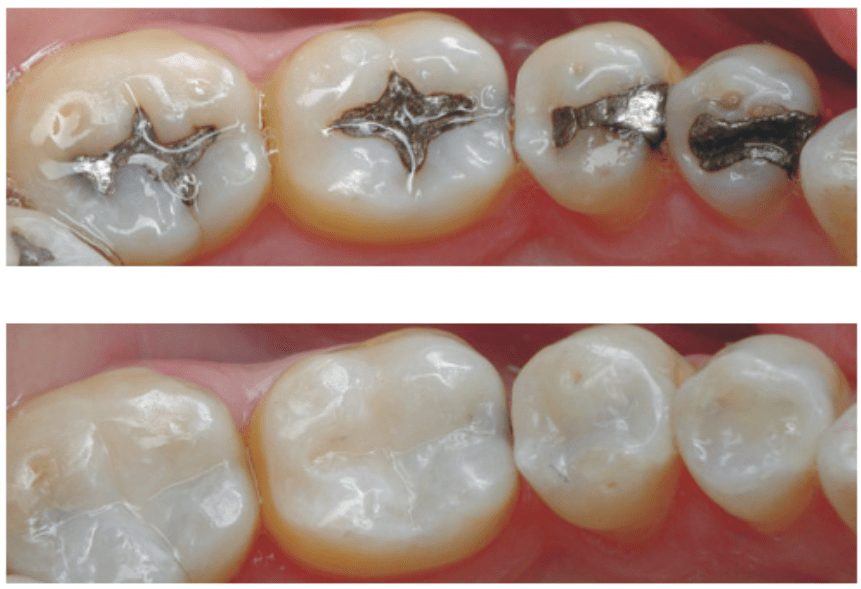
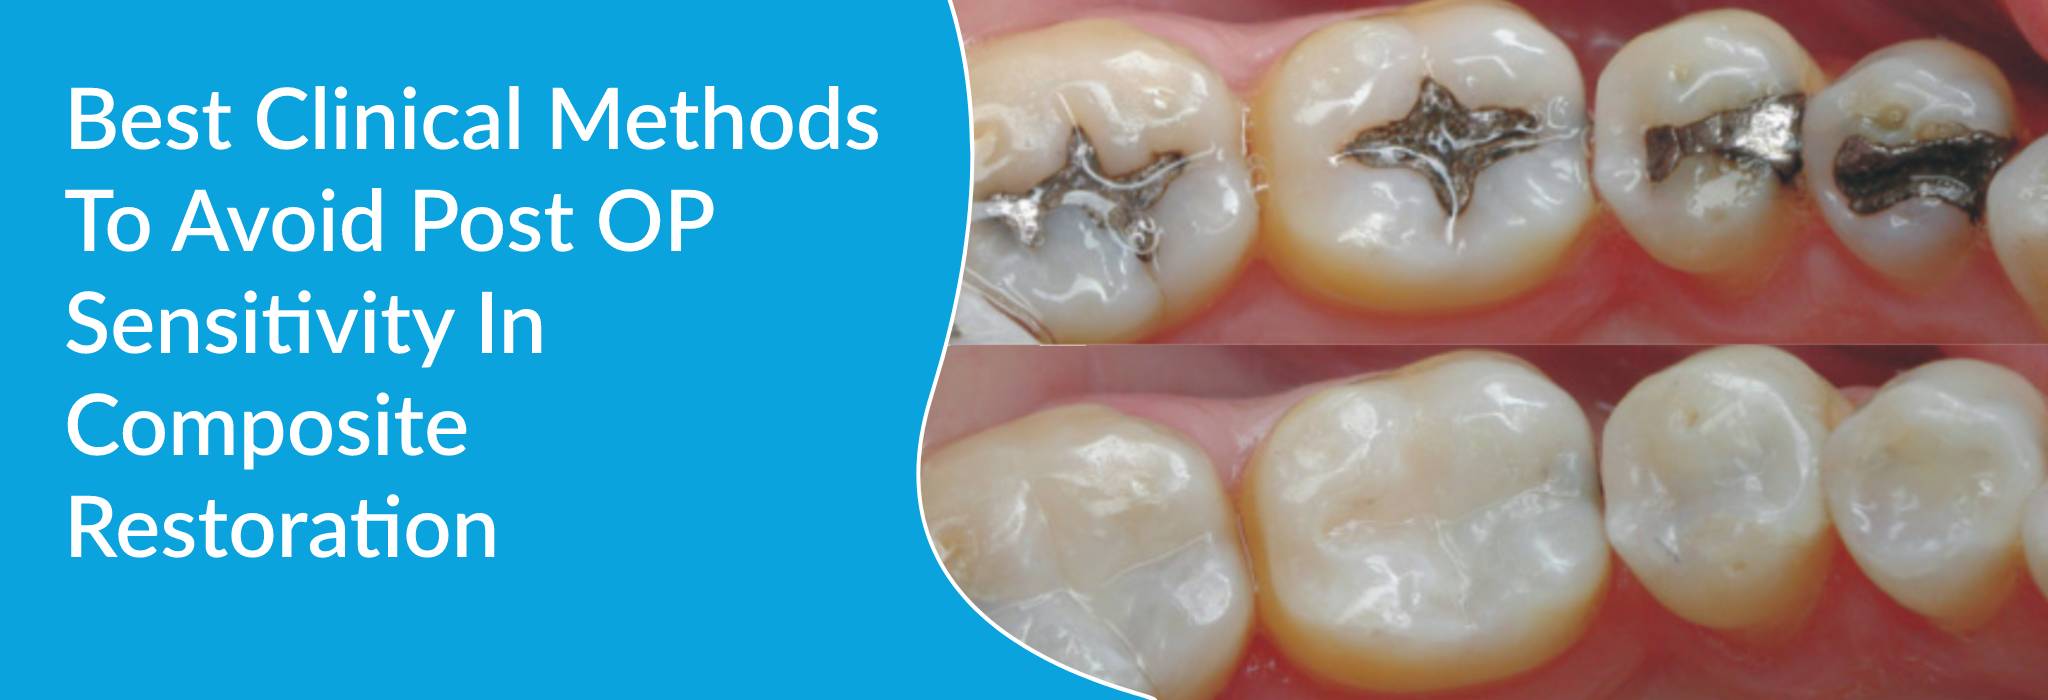
    BEST CLINICAL METHODS TO AVOID POST OP SENSITIVITY IN COMPOSITE FILLINGS

    The major reasons for op sensitivity is because of Micro- Leakage: Especially due to  improper bonding and condensation. Most of the clinicians in fact avoid composite fillings due to post op sensitivity phobia. There are lot many advancements evolved  in adhesion mechanism to counteract bonding failure, we need to understand many aspect of composite restorations to avoid these complications. This article will help you construct clarity on the right methods of composite filling:

    PROPER MARGINAL SEAL:

    • Proper Marginal Seal can be achieved by clear understanding of the complex interplay between polymerization shrinkage and adhesion.
    • The cross-linking of resin monomers into polymers is responsible for an unconstrained shrinkage of 2% to 5%.
    • The uncompensated forces may exceed the bond strength of the tooth-restoration interface, resulting in a gap formation from a loss of adhesion.
    • The shrinkage forces generated by a high modulus material or a high volumetric shrinkage can result in stresses, being transferred in a pulpal direction, resulting in dentinal tubular fluid movement that stimulates the odontoblastic process.
    • This pressure change may be responsible for postoperative sensitivity upon mastication.
    • There are lot factors which can decrease this gap formation and thus Post op sensitivity.

    HOW TO GET PROPER ADHESION:

    • Understanding Basics of adhesion principles or Dentin bonding is must to get proper adhesion
    • There are Two concepts of Bonding
    • Total etch (etchant + prime and bond) and self etch (single Bottle, all in one)
    • Total etch should be prefered for cavities or preparations involving only enamel surfaces and Self etch should be used for Dentin preparations, and for deeper restorations Resin modified glass inomers liners should be used.

      Note: The most  important thing is to prepare the tooth surface for Bonding,  creating the moist tooth surface will facilitate good bonding and remember  at any circumstances Dentin should not be dried thoroughly but moderately moist.  

    NOW STEPS FOR BONDING:

    1. The cavosurface enamel margins of the preparation should be etched for 30 seconds with 37.5% phosphoric.
    2. A self-etch primer should be applied to the dentin for 20 seconds and air-dried for 2 seconds.
    3. A bonding agent was applied to the enamel and dentin surfaces for 20 seconds, lightly air-dried and light-cured.
    4. If it is self etch one, apply the bonding agent for 40 seconds, air dry it by chip blower for 2 seconds
    5. Curing should be done for each surface in the perpendicular direction.

    NOW HOW TO REDUCE SHRINKAGE??

    Before we get on to the procedure, lets know the  major factors that influence polymerization shrinkage:

    • Type of resin,
    • filler content of the composite,
    • Elastic modulus of the material,
    • Curing characteristics,
    • Water sorption,
    • Cavity configuration, and the intensity of the light used to polymerize the composite

    TO ELABORATE:

    • First three factors are related to the Material which can not be controlled by dentist
    • Rest all are operator dependent.  

    HOW DOES LIGHT AFFECTS POLYMERIZATION??

    • Intensity of light, the illumination must be in the range of 460-480 nms. I recommned all to please check the curing unit light intensity at least once a year.
    • Time: strictly follow manufacturers instructions,
    • Distance from the curing material,  It should be as near as possible.   For each mm light intensity is reducing drastically. This diagram explains the intensity of light at 0-1mm, 1-2mm, 2-3mm. For the first 1 mm it is 65% and for 3mm it is negligible.

    ANGULATION:

    • The light coming out of the tip is like a stream of water from a hose. The flow is highly acclimated. There fore, light only goes where you point the tip.
    • Unusual features of the cavity preparation design require that you angulate the light from a variety of directions (usually requiring more curing cycles).

    PROPER CONDENSATION:

    • Avoid bulk filling and bulk curing, follow layering technique to avoid Marginal leakage
    • Use clean instruments
    • Don’t keep any voids in between the layers
    • Give sufficient time after each layer of condensation and each cycle of curing to compensate material to shrink
    • Understand the basic principles of C- Factor

      C-Factor configuration factor is the ratio of the bonded surface to the unbonded or free- surfaces in a tooth preparation. The higher the c factor greater is the potential for bond disruption from polymerization effects.

    • Don’t keep premature occlusal contacts
    • Fully excavate residual tooth decay
    • Polishing should be done after complete adjustments of occlusal contacts
    • Liquid polishers will be more useful to fill the Voids on the surfaces
    • Don’t use bonding agent as polisher
    • These are the few basic things which needs to be understood.
    • Composite restoration is purely artistic job we need to invest lot of time to master this art
    • For any query please write us in comment box
    • If you liked please do forward to your fellow colleague.

    Scroll to top